Feeding Baby Ducks
Never feed ducks without water. Water helps get food down and clean beak vents. Always give baby ducks access to water for at least an hour before feeding.
We recommend chick starter with 20% protein for the first 10 weeks, switching to a 15% grower weeks 10-18, and a 16% layer after 18 weeks.
Ducklings have no teeth but appreciate finely chopped fruits, vegetables or greens. Small insects and worms make good treats, as well.
Shelter
Not just an escape from predators and the elements, ducks need shelter to provide quiet and seclusion.
The shelter should be well ventilated and large enough that your ducks can fully expand their wings and groom.
Water
Ducklings need a ready source of clean water. Chick fountains are recommended.
Ducklings will play in water, making a mess. Be sure to clean it often.
Water should be no more than ¼" deep. Make sure ducks can easily escape the water. Baby ducks love to play in water but can easily drown if they tire.
Ducklings don't produce waterproofing oil until 4 weeks of age. In the wild, mothers apply it. Swimming your ducks too early can result in death from chill or even drowning from fatigue.
Flight
Most commercially grown ducks are too large to maintain flight and will stay around a good source of food, water and shelter.
Straight run ducks at TSC can include a mix of breeds. Be advised migrating species such as Mallard may be included. Once adult, these may or may not take up permanent residence.
Eggs
A duck egg can be used for anything a chicken egg would, but take size differences into account for recipes.
Besides being larger, duck eggs have thicker whites and proportionately larger yolks than chicken eggs. Overcooking will render them rubbery.
Many prefer duck eggs for baking, believing the high protein content helps cakes to rise and stay risen while the high fat content adds richness and flavor.
Monday, May 4, 2015
Tuesday, April 7, 2015
How to Grow Flax
Days to germination: 14 to 21 days
Days to harvest: 100 days
Light requirements: Full sun
Water requirements: Frequent but light watering
Soil: Well-drained with organic matter
Container: Suitable but not ideal
Introduction
Though flax may be better known as a crop grown for its fiber, the seeds are nutritious and eaten as an additive to many foods.
Linseed oil comes from flax seeds, and the seeds themselves are high in fiber and omega-3 fatty acids. Though seldom eaten on their own, they are an excellent supplement to many dishes. It has a slightly nutty flavor.
Flax may be grown for its seeds, but it is not your typical grain plant. It is more like an ornamental with a lovely blue flower. Some varieties of flax are annuals, and some are perennials. The type of flax usually grown for seed harvesting has the botanical name of Linum usitatissiumum and is not usually considered a floral garden plant. It may not be sold at your local garden center, but seeds can be purchased online or even at some agricularal co-ops. This kind of flax is an annual, so you don’t need to overwinter your plants.
Starting from Seed
Flax can be started indoors, and then transplanted out later or just sown directly into the garden. If you have a short growing season, you may want to start your seeds inside so your plants can mature and go to seed before the frost.
In small peat pots, plant seeds 5 weeks before your expected last frost date. Keep them in a sunny place and water often enough that the soil does not dry out. They take a while to germinate, so be patient.
Transplanting
Dig your soil well, and add in a good helping of aged manure or compost before you plant. Flax thrives on organic-rich soils. Your plants won’t get overly tall, seldom higher than 3 feet so shading shouldn’t be a huge problem.
Seeds can be sown out early in the spring, and covered in just a thin layer of soil. Keep your seeds about 12 inches apart, or at least thin down to that spacing once your plants start to come up. You can do this a week or two before your last spring frost.
Because it can take up to 3 weeks before you see any sprouts, you will have to keep the area well-weeded or you may find your flax seedlings are overwhelmed before they can get established. Mark where the seeds are so you don’t accidentally weed out something you shouldn’t.
If you are putting out started seedlings from indoors, its best to wait until the frost has passed.
Growing Instructions
Flax will needs a lot of nutrients, so you should give your plants a feeding with a standard formula fertilizer once a month through the growing season.
You will also have to water fairly frequently, though not overly heavily. Flax does best in moist but not soggy soils. Good drainage is important.
Containers
Though the flax plant is small enough to be grown in containers, the number of plants you will need may make it a difficult task. As with any seed crop, one plant usually produces a very small yield. In order to get a reasonable harvest, you need to plant a larger number of plants. Trying to do this with containers is usually inadequate.
Pests and Disease
Flax is quite prone to various fungus infections, so be prepared with the fungicide if you are going to grow flax. Many kinds of rust and wilt can infect a flax plant, so you need to be on the lookout for any strangely colored patches on the leaves, or wilting stems. Treatment with a regular fungicide is a good idea.
If that wasn’t enough to deal with, there are a few insects that are a problem with flax as well. The flax bollworm is one such pest. The adult moths lay eggs in the flowers, which hatch into hungry green striped caterpillars that eat the seeds out of the pods. Treating the plants with pesticides when the flowers are blooming can help to control the adults, and you should pick off any caterpillars you see later in the season.
Typical garden cutworms are also an issue with new flax plants. If cutworms are present in your area, use small cardboard collars to protect your seedlings or they may get sliced right through overnight. Once they are more mature, cutworms should not be an issue.
Harvest and Storage
Your seeds are ready to harvest when the large seed pods are yellow and starting to split open.
Cut the pods from the plants, and spread them out somewhere where they can dry further (not out in direct sunlight). Once the seeds are dead ripe and cannot be dented with a fingernail, you just have to separate them from their seed pods. For a small harvest, you can manually pop open each pod and take out the 4 to 6 small seeds inside.
If you have more flax to deal with, you can crush all the seed pods at once (also called threshing), by whatever means you wish. You can put them in a bag or pillowcase, and beat them against a railing or a chair, or even crush them underfoot.
Then you can use a fan or the wind to help sort the seeds from the debris. This step is called winnowing. Use a couple of containers, or even do it over a large sheet. Just pour handfuls of the debris from several feet up, and let the wind blow out the lighter pieces of leaves and seed pod. The heavier seeds will fall straight down.
As long as the seeds are completely dry, you can store them in any tight container for 8 to 10 months at room temperature. It can also be stored in the refrigerator, but it doesn’t usually prolong its life any longer. That might be a more suitable option though if your house is warm.
For an expected harvest yield, a quarter acre of flax will provide you with at least a bushel of seed.
Tuesday, March 17, 2015
How to Grow Beets
Beets are a cool season vegetable crop. This root veggie grows quickly and has many different varieties which showcase deep red, yellow or white bulbs of different shapes. They can survive frost and almost freezing temperatures, which makes them a good choice for northern gardeners and an excellent long-season crop.
A soil pH above 5.5–6 is best, otherwise growth will be stunted. Beets are a good indicator of soil pH.
Till in aged manure before planting. Beets require especially good nutrition and a high phosphorus level to germinate. Go easy on nitrogen however, an excess will cause sprawling greens and tiny bulbs beneath the soil.
Wait until soil reaches 50 degrees before planting.
Plant seeds ½ inch deep and 1-2 inches apart.
Make sure soil remains moist for germination.
In zones with low moisture and rainfall, soak the seeds for 24 hours before planting.
Early crop can be planted in March/April, and late crop anytime from June to September. Successive plantings are also possible as long as the weather doesn't exceed 75 degrees F. Space plantings about 20 days apart.
Winter crops are a definite possibility in Zone 9 and above.
Thinning is necessary, as you may get more than one seedling out of each seed. Thin when they read about 2 inches high by pinching them off. Pulling them out of the ground may disturb the close surrounding roots of nearby seedlings.
Established plants should be thinned to 3–4 inches between plants.
Mulch and water well. Beets need to maintain plenty of moisture.
Any necessary cultivation should be gentle, beets have shallow roots that are easily disturbed.
Days to maturity tend to be between 50 and 70 for most varieties, although they can be harvested at any time you see fit. If you like larger bulbs, wait longer, but understand they will be tougher and woody.
Don't let greens grow above 6 inches before harvesting.
Don’t forget about the tops! Beet greens have a delicious and distinctive flavor, and hold more nutrition than the roots.
Fresh beets can be stored in the refrigerator for 5–7 days. Clipping the tops off beets will keep them fresher for longer. Leave about one inch of stem on each beet, and store the greens separately.
For root cellar type storage, make sure you brush off any soil clinging to these crops, then store them in a cool, dry place. An unheated closet might do, or put them in a cooler in your basement.
Beets can be frozen, canned and pickled.
Tuesday, February 24, 2015
What Is the Difference between Animal Rights and Welfare ?
Although animal rights and animal welfare frequently fall on the same side of an issue, there is a fundamental difference between the two ideologies: the right of humans to use animals.
The Right to Use Animals
One of the basic tenets of animal rights is that humans do not have a right to use non-human animals for our own purposes, which include food, clothing, entertainment and vivisection. This is based on a rejection of speciesism and the knowledge that animals are sentient beings.
There are many who believe that humans do have a right to use animals for some purposes, but believe that the animals should be treated better. This position is the animal welfare position.
Example – Farmed Animals
While the animal rights position seeks the elimination of the use of animals, the animal welfare position seeks more humane conditions for the animals. The difference between these two positions can be seen as applied to an issue like farmed animals.
While the animal rights position would hold that humans do not have the right to slaughter and eat animals, the animal welfare position would be that the animals should be treated humanely before and during slaughter. The animal welfare position would not object to the consumption of animals, but would seek the elimination of cruel factory farming practices such as confining calves in veal crates, confining pregnant sows in gestational stalls, and debeaking chickens.
Animal rights advocates also oppose these cruel practices, but seek to eliminate the consumption of animals and animal products.
Unacceptable Uses
To most supporters of the animal welfare position, some uses of animals are unacceptable because the human benefit is minimal compared to the amount of animal suffering involved. These usually include uses like fur, cosmetics testing, canned hunting, and dog fighting. On these issues, both the animal rights position and animal welfare position would call for the elimination of these uses of animals.
The Animal Issues Spectrum
Like many other issues, there is a wide variety of positions on animal issues. One can imagine a spectrum with animal rights at one end, animal welfare in the middle, and the belief that animals do not deserve any moral consideration on the other end. Many people may find that their views do not fit completely within one box or the other, or may find that their positions change depending on the issue.
Other terminology
A variety of terms are used to describe positions on animal issues. These include animal protection, animal advocacy, and animal liberation. “Animal protection” and “animal advocacy” are usually understood to include both animal rights and animal welfare. Both terms embody a belief that animals should be protected and deserve some moral consideration. “Animal liberation” is usually used to describe an animal rights position, which would oppose any uses of animals for human purposes.
Monday, February 2, 2015
10 Fascinating Facts About Honey Bees
No other insect has served the needs of man like the honey bee. For centuries, beekeepers have raised honey bees, harvesting the sweet honey they produce and relying on them to pollinate crops. Honey bees pollinate an estimated one-third of all the food crops we consume. Here are 10 facts about honey bees you might not know.
1. Honey bees can fly at speeds of up to 15 miles per hour.
That might seem fast, but in the bug world, it's actually rather slow. Honey bees are built for short trips from flower to flower, not for long distance travel. Their tiny wings must flap about 12,000 times per minute just to keep their pollen-laden bodies aloft for the flight home.
2. A honey bee colony can contain up to 60,000 bees at its peak.
It takes a lot of bees to get all the work done. Nurse bees care for the young, while the queen's attendant workers bathe and feed her. Guard bees stand watch at the door. Construction workers build the beeswax foundation in which the queen lays eggs and the workers store honey. Undertakers carry the dead from the hive. Foragers must bring back enough pollen and nectar to feed the entire community.
3. A single honey bee worker produces about 1/12th of a teaspoon of honey in her lifetime.
For honey bees, there's power in numbers. From spring to fall, the worker bees must produce about 60 lbs. of honey to sustain the entire colony during the winter. It takes tens of thousands of workers to get the job done.
4. A queen honey bee stores a lifetime supply of sperm.
The queen bee can live 3-4 years, but her biological clock ticks a lot faster than you might think. Just a week after emerging from her queen cell, the new queen flies from the hive to mate. If she doesn't do so within 20 days, it's too late; she loses her ability to mate. If successful, however, she never needs to mate again. She holds the sperm in her spermatheca and uses it to fertilize eggs throughout her life.
5. The queen honey bee lays up to 1,500 eggs per day, and may lay up to 1 million in her lifetime.
Just 48 hours after mating, the queen begins her lifelong task of laying eggs. So prolific an egg layer is she, she can produce her own body weight in eggs in a single day. In fact, she has no time for any other chores, so attendant workers take care of all her grooming and feeding.
6. The honey bee uses the most complex symbolic language of any animal on earth, outside of the primate family.
Honey bees pack a million neurons into a brain that measures a mere cubic millimeter, and they use every one of them. Worker bees must perform different roles throughout their lives. Foragers must find flowers, determine their value as a food source, navigate back home, and share detailed information about their finds with other foragers. Karl von Frisch received the Nobel Prize in Medicine in 1973 for cracking the language code of honey bees – the waggle dance.
7. Drones, the only male honey bees, die immediately after mating.
Male honey bees serve only one purpose: they provide sperm to the queen. About a week after emerging from their cells, the drones are ready to mate. Once they've fulfilled that purpose, they die.
8. Honey bees maintain a constant temperature of about 93ยบ F within the hive year-round.
As temperatures fall, the bees form a tight group within their hive to stay warm. Honey bee workers cluster around the queen, insulating her from the outside cold. In summer, the workers fan the air within the hive with their wings, keeping the queen and brood from overheating. You can hear the hum of all those wings beating inside the hive from several feet away.
9. Honey bees produce beeswax from special glands on their abdomens.
The youngest worker bees make the beeswax, from which workers construct the honeycomb. Eight paired glands on the underside of the abdomen produce wax droplets, which harden into flakes when exposed to air. The workers must work the wax flakes in their mouths to soften them into a workable construction material.
10. An industrious worker bee may visit 2,000 flowers per day.
She can't carry pollen from that many flowers at once, so she'll visit 50-100 flowers before heading home. All day long, she repeats these round trip flights to forage, which puts a lot of wear and tear on her body. A hardworking forager may live just 3 weeks.
1. Honey bees can fly at speeds of up to 15 miles per hour.
That might seem fast, but in the bug world, it's actually rather slow. Honey bees are built for short trips from flower to flower, not for long distance travel. Their tiny wings must flap about 12,000 times per minute just to keep their pollen-laden bodies aloft for the flight home.
2. A honey bee colony can contain up to 60,000 bees at its peak.
It takes a lot of bees to get all the work done. Nurse bees care for the young, while the queen's attendant workers bathe and feed her. Guard bees stand watch at the door. Construction workers build the beeswax foundation in which the queen lays eggs and the workers store honey. Undertakers carry the dead from the hive. Foragers must bring back enough pollen and nectar to feed the entire community.
3. A single honey bee worker produces about 1/12th of a teaspoon of honey in her lifetime.
For honey bees, there's power in numbers. From spring to fall, the worker bees must produce about 60 lbs. of honey to sustain the entire colony during the winter. It takes tens of thousands of workers to get the job done.
4. A queen honey bee stores a lifetime supply of sperm.
The queen bee can live 3-4 years, but her biological clock ticks a lot faster than you might think. Just a week after emerging from her queen cell, the new queen flies from the hive to mate. If she doesn't do so within 20 days, it's too late; she loses her ability to mate. If successful, however, she never needs to mate again. She holds the sperm in her spermatheca and uses it to fertilize eggs throughout her life.
5. The queen honey bee lays up to 1,500 eggs per day, and may lay up to 1 million in her lifetime.
Just 48 hours after mating, the queen begins her lifelong task of laying eggs. So prolific an egg layer is she, she can produce her own body weight in eggs in a single day. In fact, she has no time for any other chores, so attendant workers take care of all her grooming and feeding.
6. The honey bee uses the most complex symbolic language of any animal on earth, outside of the primate family.
Honey bees pack a million neurons into a brain that measures a mere cubic millimeter, and they use every one of them. Worker bees must perform different roles throughout their lives. Foragers must find flowers, determine their value as a food source, navigate back home, and share detailed information about their finds with other foragers. Karl von Frisch received the Nobel Prize in Medicine in 1973 for cracking the language code of honey bees – the waggle dance.
7. Drones, the only male honey bees, die immediately after mating.
Male honey bees serve only one purpose: they provide sperm to the queen. About a week after emerging from their cells, the drones are ready to mate. Once they've fulfilled that purpose, they die.
8. Honey bees maintain a constant temperature of about 93ยบ F within the hive year-round.
As temperatures fall, the bees form a tight group within their hive to stay warm. Honey bee workers cluster around the queen, insulating her from the outside cold. In summer, the workers fan the air within the hive with their wings, keeping the queen and brood from overheating. You can hear the hum of all those wings beating inside the hive from several feet away.
9. Honey bees produce beeswax from special glands on their abdomens.
The youngest worker bees make the beeswax, from which workers construct the honeycomb. Eight paired glands on the underside of the abdomen produce wax droplets, which harden into flakes when exposed to air. The workers must work the wax flakes in their mouths to soften them into a workable construction material.
10. An industrious worker bee may visit 2,000 flowers per day.
She can't carry pollen from that many flowers at once, so she'll visit 50-100 flowers before heading home. All day long, she repeats these round trip flights to forage, which puts a lot of wear and tear on her body. A hardworking forager may live just 3 weeks.
Sunday, January 11, 2015
Supplies for Baby Chicks
What do you need to be sure you're ready for them when they get home? This list will take you through all the supplies you'll need for your new baby chicks.
Brooder Guard or Area
A brooder area is, simply put, a draft-free place where you will keep your chicks. Feed and farm supply stores sell large, oval galvanized tubs for this purpose, and you can buy specialized brooders complete with heat, but a brooder can also be made of cardboard, a plastic tub, a kiddie pool, or anything else you can dream up.
One caution: chicks have a habit of finding any little crevice or opening in the brooder and getting out. You'd think they could find their way back in, but when they're very young, they can't. You'll hear the loud cheeps of a lost chick anytime one gets out, but if they can't get back in, they can eventually die of stress, starvation, or thirst.
Brooder size: 2 square feet of space per chick.
Brooder Heat Lamp
Unless you have a complete brooder, ou'll need a 250-watt heat lamp to keep the chicks warm. The area under the lamps should be 95 degrees F the first week, decreasing by 5 degrees per week until the chicks are fully feathered out (about 6 weeks of age) and/or you've reached the ambient temperature outdoors at night.
Have a backup, too. Chicks will die if they get too cold, so a spare light bulb will help ensure they never freeze to death. The light bulb needs to be housed in a proper lamp housing with a metal guard to prevent it from catching the bedding on fire if it should fall. Making sure it's height-adjustable is helpful, too.
One 250-watt heat lamp will warm 75 chicks at 50 degrees F ambient temperature.
Chick Waterer
I like to use these Mason jar bases for chicks for the first week or two. You'll find as they grow, you'll refill it more and more often. I use two half-gallon Mason jars with bases per 25 chicks and refill every 2 or 3 days. You need something that has a very small trough for them to drink out of, or else they'll get right in it, get wet, chilled and possibly die.
Once they're a bit bigger, they can handle a gallon waterer or more. After about two weeks, I just move to a 5-gallon metal waterer like I use for my grown layers.
Set the waterers up out of the shavings on a piece of wood or other makeshift stand, or you'll be picking shavings out of the water several times a day.
Chick Feeders
It's worth investing in special chick-sized feeders. I like the feeders with holes that they peck through for the first week or two, like the ones shown in the photo. You'll save enough money in wasted feed with the chick feeders that it will pay for their cost. They're designed so that the chicks can't get into and poop in the feed or tip it over. Allow free access to feed at all times.
The very first day, I spread some feed on a piece of cardboard and tap it. They immediately find the feed and the sound of beaks tapping on cardboard leads other chicks to the sound.
After about a week or two, I move to a tube-style feeder. Leave the chick feeders and new feeder out together for a day or so, to make sure they find the new food.
Bedding
Baby chicks need bedding just like older hens. Pine shavings are best as straw or hay are the wrong scale for them. They will get lost! Others start chicks on newspaper covered with hardware cloth. Never start chicks on newspaper alone, because it's too slippery. They can develop a condition called spraddle legs from being started on newspaper.
Feed
Use a high-quality feed, usually called "chick starter." Different brands of feed will have you transition to grower at different ages - some at 6 weeks of age and some as late as 6 months of age. Follow the recommendations of your feed manufacturer.
Medicated or not? It's up to you. If you have your chicks vaccinated for coccidiosis at the hatchery, do not feed medicated feed. If they're unvaccinated, you might want to provide them with medicated feed for extra protection.
Supplements
Here are some of the "extras" I've had success with:
Gro Gel Plus: a gel that you feed to new hatchlings. Helps them find the feed and gets them off to a good start. Not necessary, but nice.
Quik Chik (or another brand): a vitamin and electrolyte powder you use in their water.
Diatomaceous earth: use food-grade only. Can be sprinkled in their feed to deter diseases, and when they're older you can sprinkle it in the coop (wear a respirator!) to kill mites.
Grit: after the first week, if the birds have any access to bugs or worms, make sure they also have a source of grit, which helps them digest "real" food. Just some sand or dirt is fine, or you can buy grit at a feed or farm store.
Brooder Guard or Area
A brooder area is, simply put, a draft-free place where you will keep your chicks. Feed and farm supply stores sell large, oval galvanized tubs for this purpose, and you can buy specialized brooders complete with heat, but a brooder can also be made of cardboard, a plastic tub, a kiddie pool, or anything else you can dream up.
One caution: chicks have a habit of finding any little crevice or opening in the brooder and getting out. You'd think they could find their way back in, but when they're very young, they can't. You'll hear the loud cheeps of a lost chick anytime one gets out, but if they can't get back in, they can eventually die of stress, starvation, or thirst.
Brooder size: 2 square feet of space per chick.
Brooder Heat Lamp
Unless you have a complete brooder, ou'll need a 250-watt heat lamp to keep the chicks warm. The area under the lamps should be 95 degrees F the first week, decreasing by 5 degrees per week until the chicks are fully feathered out (about 6 weeks of age) and/or you've reached the ambient temperature outdoors at night.
Have a backup, too. Chicks will die if they get too cold, so a spare light bulb will help ensure they never freeze to death. The light bulb needs to be housed in a proper lamp housing with a metal guard to prevent it from catching the bedding on fire if it should fall. Making sure it's height-adjustable is helpful, too.
One 250-watt heat lamp will warm 75 chicks at 50 degrees F ambient temperature.
Chick Waterer
I like to use these Mason jar bases for chicks for the first week or two. You'll find as they grow, you'll refill it more and more often. I use two half-gallon Mason jars with bases per 25 chicks and refill every 2 or 3 days. You need something that has a very small trough for them to drink out of, or else they'll get right in it, get wet, chilled and possibly die.
Once they're a bit bigger, they can handle a gallon waterer or more. After about two weeks, I just move to a 5-gallon metal waterer like I use for my grown layers.
Set the waterers up out of the shavings on a piece of wood or other makeshift stand, or you'll be picking shavings out of the water several times a day.
Chick Feeders
It's worth investing in special chick-sized feeders. I like the feeders with holes that they peck through for the first week or two, like the ones shown in the photo. You'll save enough money in wasted feed with the chick feeders that it will pay for their cost. They're designed so that the chicks can't get into and poop in the feed or tip it over. Allow free access to feed at all times.
The very first day, I spread some feed on a piece of cardboard and tap it. They immediately find the feed and the sound of beaks tapping on cardboard leads other chicks to the sound.
After about a week or two, I move to a tube-style feeder. Leave the chick feeders and new feeder out together for a day or so, to make sure they find the new food.
Bedding
Baby chicks need bedding just like older hens. Pine shavings are best as straw or hay are the wrong scale for them. They will get lost! Others start chicks on newspaper covered with hardware cloth. Never start chicks on newspaper alone, because it's too slippery. They can develop a condition called spraddle legs from being started on newspaper.
Feed
Use a high-quality feed, usually called "chick starter." Different brands of feed will have you transition to grower at different ages - some at 6 weeks of age and some as late as 6 months of age. Follow the recommendations of your feed manufacturer.
Medicated or not? It's up to you. If you have your chicks vaccinated for coccidiosis at the hatchery, do not feed medicated feed. If they're unvaccinated, you might want to provide them with medicated feed for extra protection.
Supplements
Here are some of the "extras" I've had success with:
Gro Gel Plus: a gel that you feed to new hatchlings. Helps them find the feed and gets them off to a good start. Not necessary, but nice.
Quik Chik (or another brand): a vitamin and electrolyte powder you use in their water.
Diatomaceous earth: use food-grade only. Can be sprinkled in their feed to deter diseases, and when they're older you can sprinkle it in the coop (wear a respirator!) to kill mites.
Grit: after the first week, if the birds have any access to bugs or worms, make sure they also have a source of grit, which helps them digest "real" food. Just some sand or dirt is fine, or you can buy grit at a feed or farm store.
Wednesday, December 24, 2014
Wednesday, December 10, 2014
Tuesday, December 2, 2014
WHAT HAPPENS TO RABBITS IN THE WINTER?
Winter's cooler temperatures and lack of vegetation forces wild rabbits to spend more time in search of food. They often seek shelter in underground dens they have lined with grass, straw and twigs as insulators. Domesticated rabbits living in outdoor hutches rely on sensitive human companions that remember to provide additional protection from wind, rain and snow. During extreme cold temperatures -- below zero -- it's best to move domesticated rabbits inside.
Diet Changes In Winter
As noted by Fish and Game Magazine, the once abundant food supply wild rabbits enjoy is decimated by the onset and continuation of winter. Lush vegetation is withered away. Most of the clover, tender young plants, berries and vegetables are gone or difficult to find because they've already been consumed. Wild rabbits resort to eating woody plant parts including the twigs, bark and buds of trees and bushes. Penn State University explains the rabbit's year-round habit of eating their own pelleted feces becomes even more important in the winter months. Rabbits do so to extract additional nutrients because their digestive systems aren't particularly efficient.
Weary from Being Hunted
The winter months aren't tough on wild rabbits solely due to the lack of food. This is the time when humans and other animal predators target them as prey. Game and Fish Magazine states that wild rabbits are hunted in the winter months by house cats and bobcats on the ground and by hawks, owls and other feathered predators from the sky. Add people with shotguns, and wild rabbits face a variety of threats to their chances of surviving until the onset of spring.
Creative Hiding
The thickets and bushes rabbits hide amongst are reduced to bramble with no vegetative covering during winter. It's tough to hide just among stems and twigs. Brush piles and hollowed-out stumps and logs become effective refuge. Some rabbits change color to blend in with the predominantly white and gray landscape. Rabbits also stay put in cold weather to conserve energy. Game and Fish Magazine discusses how hunters walking too quickly in colder temperatures often don't spot rabbits that are in a holding pattern.
Domesticated Rabbits Need Hutch Protection
The Verlannahill Rabbitry states that rabbits can withstand cold much better than excessive heat. That's good news for keepers of domesticated rabbits in outdoor hutches. Rabbits can easily tolerate temperatures hovering at the freezing mark -- 32 degrees Fahrenheit -- or below provided they are sheltered from wind and wet. Use extra straw or other bedding to completely insulate one section of the hutch where your rabbits are protected. Do not enclose the entire hutch as rabbits do require fresh air.
Diet Changes In Winter
As noted by Fish and Game Magazine, the once abundant food supply wild rabbits enjoy is decimated by the onset and continuation of winter. Lush vegetation is withered away. Most of the clover, tender young plants, berries and vegetables are gone or difficult to find because they've already been consumed. Wild rabbits resort to eating woody plant parts including the twigs, bark and buds of trees and bushes. Penn State University explains the rabbit's year-round habit of eating their own pelleted feces becomes even more important in the winter months. Rabbits do so to extract additional nutrients because their digestive systems aren't particularly efficient.
Weary from Being Hunted
The winter months aren't tough on wild rabbits solely due to the lack of food. This is the time when humans and other animal predators target them as prey. Game and Fish Magazine states that wild rabbits are hunted in the winter months by house cats and bobcats on the ground and by hawks, owls and other feathered predators from the sky. Add people with shotguns, and wild rabbits face a variety of threats to their chances of surviving until the onset of spring.
Creative Hiding
The thickets and bushes rabbits hide amongst are reduced to bramble with no vegetative covering during winter. It's tough to hide just among stems and twigs. Brush piles and hollowed-out stumps and logs become effective refuge. Some rabbits change color to blend in with the predominantly white and gray landscape. Rabbits also stay put in cold weather to conserve energy. Game and Fish Magazine discusses how hunters walking too quickly in colder temperatures often don't spot rabbits that are in a holding pattern.
Domesticated Rabbits Need Hutch Protection
The Verlannahill Rabbitry states that rabbits can withstand cold much better than excessive heat. That's good news for keepers of domesticated rabbits in outdoor hutches. Rabbits can easily tolerate temperatures hovering at the freezing mark -- 32 degrees Fahrenheit -- or below provided they are sheltered from wind and wet. Use extra straw or other bedding to completely insulate one section of the hutch where your rabbits are protected. Do not enclose the entire hutch as rabbits do require fresh air.
Tuesday, November 11, 2014
Pumpkin Seeds - Buying, Selection and Saving
Seed Selection:
Experienced growers will tell you, that good seed is an important to a successful crop.
What this means is:
The seed is viable and a good germination rate(percentage of seeds sprouting) is likely to occur.
Genetics, genetics, genetics. If you want a large pumpkin, obtain seeds from a large fruited parent. However, not all large pumpkins are "pretty". You may have to sacrifice a little size for a rounder, oranger strain. Plant viruses can be stored in the seed, and carry into the next year's crop. Look for seed from an experienced grower, who rotates his crops, and knows to remove any diseased vegetation from his garden.
The seeds will produce the type of fruit you want. Cross-pollination is common among the Cucurbita Family. Any experienced home gardener has experienced a cross between a pumpkin and a zucchini at least once. The problem is that when cross-pollination occurs, the genetics are contained in the seed of the crossed fruit, and will not show up until next year. Experienced growers know how to minimize this risk.
Keep the above thoughts in mind, when you acquire seeds. But, do not let it deter you from either saving your own, or getting seed from another grower.
Saving Seeds:
Here are the simple steps for saving seed for next year:
1. Select large, healthy pumpkins from healthy plants. Remember, large begets large, and round begets round.
2. If one plant appears more disease resistant than others, use a pumpkin from this vine.
3. Select two or three (or more) pumpkins, if possible. Using several fruit increases the likelihood of good germination.
4. Extract the seeds from the pumpkins.
5. Wash and rinse seeds thoroughly, using soapy, lukewarm water. Do not use hot water, and do not soak them in water.
6. Drain seeds in a strainer.
7. Spread seed out on a screen.
8. Stir the seeds often the first two days. Turn them over as you stir.
9. Allow the seeds to air dry in a cool, dry area for three weeks. Longer is recommended. Do not cut the time short, even if the seeds appear "dry".
10. Store seeds in a bag, envelope or jar in a cool dry place. Use of an air tight jar is not recommended, because if the seeds have not thoroughly dried, they will mold and rot.
11. Mark the seeds with date and type of pumpkin.
12. Some people place the seed in a freezer for a couple of weeks before sowing them, to replicate nature's winter cycle. This is optional and I have seen no difference.
Experienced growers will tell you, that good seed is an important to a successful crop.
What this means is:
The seed is viable and a good germination rate(percentage of seeds sprouting) is likely to occur.
Genetics, genetics, genetics. If you want a large pumpkin, obtain seeds from a large fruited parent. However, not all large pumpkins are "pretty". You may have to sacrifice a little size for a rounder, oranger strain. Plant viruses can be stored in the seed, and carry into the next year's crop. Look for seed from an experienced grower, who rotates his crops, and knows to remove any diseased vegetation from his garden.
The seeds will produce the type of fruit you want. Cross-pollination is common among the Cucurbita Family. Any experienced home gardener has experienced a cross between a pumpkin and a zucchini at least once. The problem is that when cross-pollination occurs, the genetics are contained in the seed of the crossed fruit, and will not show up until next year. Experienced growers know how to minimize this risk.
Keep the above thoughts in mind, when you acquire seeds. But, do not let it deter you from either saving your own, or getting seed from another grower.
Saving Seeds:
Here are the simple steps for saving seed for next year:
1. Select large, healthy pumpkins from healthy plants. Remember, large begets large, and round begets round.
2. If one plant appears more disease resistant than others, use a pumpkin from this vine.
3. Select two or three (or more) pumpkins, if possible. Using several fruit increases the likelihood of good germination.
4. Extract the seeds from the pumpkins.
5. Wash and rinse seeds thoroughly, using soapy, lukewarm water. Do not use hot water, and do not soak them in water.
6. Drain seeds in a strainer.
7. Spread seed out on a screen.
8. Stir the seeds often the first two days. Turn them over as you stir.
9. Allow the seeds to air dry in a cool, dry area for three weeks. Longer is recommended. Do not cut the time short, even if the seeds appear "dry".
10. Store seeds in a bag, envelope or jar in a cool dry place. Use of an air tight jar is not recommended, because if the seeds have not thoroughly dried, they will mold and rot.
11. Mark the seeds with date and type of pumpkin.
12. Some people place the seed in a freezer for a couple of weeks before sowing them, to replicate nature's winter cycle. This is optional and I have seen no difference.
Tuesday, October 21, 2014
Growing Peppers
Choose a site with full sun for your pepper plot. Don't plant peppers where tomatoes or eggplants grew previously, because all three are members of the nightshade family and are subject to similar diseases. Make sure the soil drains well; standing water encourages root rot.
Garden centers offer a good variety of transplants, but the choices are greater when you grow peppers from seed. Pepper roots don't like to be disturbed, so plant them indoors in peat pots two months before the last frost date, sowing three seeds to a pot. Maintain the soil temperature at 75°F, and keep the seedlings moist, but not wet. Provide at least 5 hours of strong sunlight a day, or ideally, keep the plants under lights for 12 or more hours daily. Once the seedlings are 2 to 3 inches tall, thin them by leaving the strongest plant in each pot and cutting the others off at soil level.
Seedlings are ready for the garden when they are 4 to 6 inches tall. Before moving the young plants to the garden, harden them off for about a week. Peppers are very susceptible to transplant "shock," which can interrupt growth for weeks. To avoid shocking the plants, make sure the soil temperature is at least 60°F before transplanting; this usually occurs 2 to 3 weeks after the last frost. Transplant on a cloudy day or in the evening to reduce the danger of sun scorch; if this is not possible, provide temporary shade for the transplanted seedlings.
When buying transplants, look for ones with strong stems and dark green leaves. Pass up those that already have tiny fruits on them, because such plants won't produce well. Peppers take at least 2 months from the time the plants are set out to the time they produce fruit, so short-season growers should select early-maturing cultivars.
Space transplants about 1½ feet apart in rows at least 2 feet apart, keeping in mind that most hot-pepper cultivars need less room than sweet ones. If the plot is exposed to winds, stake the plants, but put these supports in place before transplanting the seedlings to keep from damaging roots. To deter cutworms, place a cardboard collar around each stem, pushing it at least an inch into the ground. If the weather turns chilly and rainy, protect young plants with hotcaps.
Garden centers offer a good variety of transplants, but the choices are greater when you grow peppers from seed. Pepper roots don't like to be disturbed, so plant them indoors in peat pots two months before the last frost date, sowing three seeds to a pot. Maintain the soil temperature at 75°F, and keep the seedlings moist, but not wet. Provide at least 5 hours of strong sunlight a day, or ideally, keep the plants under lights for 12 or more hours daily. Once the seedlings are 2 to 3 inches tall, thin them by leaving the strongest plant in each pot and cutting the others off at soil level.
Seedlings are ready for the garden when they are 4 to 6 inches tall. Before moving the young plants to the garden, harden them off for about a week. Peppers are very susceptible to transplant "shock," which can interrupt growth for weeks. To avoid shocking the plants, make sure the soil temperature is at least 60°F before transplanting; this usually occurs 2 to 3 weeks after the last frost. Transplant on a cloudy day or in the evening to reduce the danger of sun scorch; if this is not possible, provide temporary shade for the transplanted seedlings.
When buying transplants, look for ones with strong stems and dark green leaves. Pass up those that already have tiny fruits on them, because such plants won't produce well. Peppers take at least 2 months from the time the plants are set out to the time they produce fruit, so short-season growers should select early-maturing cultivars.
Space transplants about 1½ feet apart in rows at least 2 feet apart, keeping in mind that most hot-pepper cultivars need less room than sweet ones. If the plot is exposed to winds, stake the plants, but put these supports in place before transplanting the seedlings to keep from damaging roots. To deter cutworms, place a cardboard collar around each stem, pushing it at least an inch into the ground. If the weather turns chilly and rainy, protect young plants with hotcaps.
Thursday, October 9, 2014
A first in Europe: Birth of four foals from genotyped, cryopreserved embryos !
Four foals were successfully born as the result of the transfer of genotyped and cryopreserved embryos. Researchers report that this is a first in Europe. The goal of this work is to better understand embryonic development, control livestock reproduction, and maintain breed genetic diversity. Furthermore, it is advantageous for the horse industry to be able to determine the traits of a future foal.
Genotyping allows scientists to choose the embryos they want to use based on different criteria: sex, like in this experiment, the absence of known genetic disorders, or, perhaps in the future, other traits that are tied to behavior, such as emotivity or sociability.
Tuesday, September 30, 2014
How to Feed a House Rabbit
Your house rabbit needs to have a good diet to stay healthy and live a long life. A well-balanced diet will consist of a good mix of hay, greens, food pellets, and the occasional healthy treat.
1. Give your rabbit plenty of hay. Hay is the most important part of your rabbit's diet, since it provides lots of fiber to aid digestion. A grass hay such as Timothy should be available at all times, allowing the rabbit to eat as much as he or she wants. You can add a variety of hays to encourage more hay consumption. Blue, Brome, Rye, Fescue, Orchard, and Timothy hay can make an tasty blend. Alfalfa can also be offered as an occasional treat to adult rabbits, and should be the primary hay given to babies.
2. Give leafy greens frequently. Look for greens that are dark in color, like dandelion, chicory, parsley, romaine lettuce and cilantro. Always buy organic lettuce. Wash the greens thoroughly before giving them to the rabbit. Depending on your rabbit's needs, sometimes you should only give greens once a week, but most rabbits like lettuce or other greens as one of their two meals every day. The other meal should be pellets (don't forget that hay should always be accessible).
3. Supplement your rabbit's diet with a good quality pellet. Contrary to popular belief, pellets are in fact the least important part of a healthy rabbit diet. Note: Even when you are planning on changing your bunny to a healthier pellet, do so gradually, mixing in more of the new with the old over a months time. This will prevent serious digestive upsets. Feed your adult rabbits a small amount of pellets daily, about 1/4 cup for every five pounds of body weight. Babies that are weaned should have unlimited alfalfa based pellets because alfalfa has extra calories.
4. Keep your rabbit supplied with fresh water. Like all animals, rabbits need fresh water. You can use a heavy bowl or a water bottle. Some rabbits prefer one over the other. A water bottle may need to be changed less frequently than a bowl, which can easily collect rabbit hair and other pollutants. Either will need to be changed and cleaned regularly. A stuck nozzle or broken water bottle can easily go unnoticed. Make sure to do a quick daily check of your water bottle. A simple push of your finger on the nozzle will help ensure it is working properly.
5. Feed your rabbit small amounts of healthy treats, occasionally. Small slices of carrot, banana, apple or a few cheerios make good treats. A couple of raisins is another fun snack. Treats should make up only a tiny portion of your rabbit's diet. For bunnies with extra sensitive digestive systems, use mint, basil and rosemary as a healthy sugarless treat. Other good treats are small amounts of carrot, (unlike Bugs Bunny, a real rabbit can get very sick from eating a lot of carrot) dried banana chips, fresh banana, apple, blueberries, strawberries, wild strawberries, (best from your own backyard) and wild cherry tree branches (not the kind of tree that actually grows cherries). Again, please do not feed your rabbit treats too much otherwise it could make your rabbit sick! All the listed treats should be selectively given except for wild cherry tree branches as they are good for rabbit's teeth to chew on (giving them cardboard toilet paper rolls after they have been used is also a good idea if they don't have much glue on them and is also a good way to recycle).
1. Give your rabbit plenty of hay. Hay is the most important part of your rabbit's diet, since it provides lots of fiber to aid digestion. A grass hay such as Timothy should be available at all times, allowing the rabbit to eat as much as he or she wants. You can add a variety of hays to encourage more hay consumption. Blue, Brome, Rye, Fescue, Orchard, and Timothy hay can make an tasty blend. Alfalfa can also be offered as an occasional treat to adult rabbits, and should be the primary hay given to babies.
2. Give leafy greens frequently. Look for greens that are dark in color, like dandelion, chicory, parsley, romaine lettuce and cilantro. Always buy organic lettuce. Wash the greens thoroughly before giving them to the rabbit. Depending on your rabbit's needs, sometimes you should only give greens once a week, but most rabbits like lettuce or other greens as one of their two meals every day. The other meal should be pellets (don't forget that hay should always be accessible).
3. Supplement your rabbit's diet with a good quality pellet. Contrary to popular belief, pellets are in fact the least important part of a healthy rabbit diet. Note: Even when you are planning on changing your bunny to a healthier pellet, do so gradually, mixing in more of the new with the old over a months time. This will prevent serious digestive upsets. Feed your adult rabbits a small amount of pellets daily, about 1/4 cup for every five pounds of body weight. Babies that are weaned should have unlimited alfalfa based pellets because alfalfa has extra calories.
4. Keep your rabbit supplied with fresh water. Like all animals, rabbits need fresh water. You can use a heavy bowl or a water bottle. Some rabbits prefer one over the other. A water bottle may need to be changed less frequently than a bowl, which can easily collect rabbit hair and other pollutants. Either will need to be changed and cleaned regularly. A stuck nozzle or broken water bottle can easily go unnoticed. Make sure to do a quick daily check of your water bottle. A simple push of your finger on the nozzle will help ensure it is working properly.
5. Feed your rabbit small amounts of healthy treats, occasionally. Small slices of carrot, banana, apple or a few cheerios make good treats. A couple of raisins is another fun snack. Treats should make up only a tiny portion of your rabbit's diet. For bunnies with extra sensitive digestive systems, use mint, basil and rosemary as a healthy sugarless treat. Other good treats are small amounts of carrot, (unlike Bugs Bunny, a real rabbit can get very sick from eating a lot of carrot) dried banana chips, fresh banana, apple, blueberries, strawberries, wild strawberries, (best from your own backyard) and wild cherry tree branches (not the kind of tree that actually grows cherries). Again, please do not feed your rabbit treats too much otherwise it could make your rabbit sick! All the listed treats should be selectively given except for wild cherry tree branches as they are good for rabbit's teeth to chew on (giving them cardboard toilet paper rolls after they have been used is also a good idea if they don't have much glue on them and is also a good way to recycle).
Friday, September 5, 2014
Storing Vegetables for Winter
Vegetable gardens may close down for the winter in cold climates, but that doesn't mean we can't still enjoy the vegetables we grew. Many vegetables will keep for months in cold storage, if you can provide the right conditions. Choose your vegetables well, keep an eye on them through out the winter and don't be shy about using them. They won't last forever.
1. Store only fully mature vegetables. Immature fruits and vegetables will rot quickly. Hold off harvesting as long as possible, especially with root vegetables, that can withstand some frost.
2. Do not store vegetables that have been bruised or nicked or that show the slightest sign of rot. Be careful when handling them.
3. Remove all excess soil. Don't wash the vegetables, just let them dry and brush off the soil. You can wash them well before using them.
4. Thoroughly clean your storage area before each use.
5. Keep the storage area dark.
6. Do not expose stored vegetables to temperatures below freezing.
7. Check on your stored vegetables every week or two. Storage times are just approximations, since vegetables, temperatures and conditions can vary widely.
8. Use vegetables taken from cold storage as soon as possible. They will not last as long as they would if they had been freshly picked.
Thursday, July 10, 2014
The health benefits of turkey
The pros
Turkey is a rich source of protein.
Skinless turkey is low in fat. White meat is lower in kilojoules and has less fat than the dark meat. A typical turkey consists of 70 per cent white meat and 30 per cent dark meat.
Turkey meat is a source of iron, zinc, potassium and phosphorus.
It is also a source of vitamin B6 and niacin, which are both essential for the body's energy production.
Regular turkey consumption can help lower cholesterol levels. The meat is low-GI and can help keep insulin levels stable.
Turkey contains the amino acid tryptophan, which produces serotonin and plays an important role in strengthening the immune system.
It is also a source of selenium, which is essential for thyroid hormone metabolism. It also boosts immunity and acts as an antioxidant.
The cons
Turkey can be high in sodium.
Some meat, particularly prepackaged slices, can be processed and contain other substances.Turkey skin is high in fat.
Research suggests large amounts of tryptophan can make you sleepy.
Monday, July 7, 2014
Raising Chickens and Its Benefits
It looks like everyone is enticed to raise their own chickens at home. I wouldn’t wonder why they are tempted in doing so. Raising your own chickens offers a lot of benefits. You can have your own chicken meat and eggs. These might be the obvious benefits, but they do not end there. Raising chickens can give you more on what you don’t expect. In this article, we will find out the other benefits of raising chickens in your own home.
Healthier and tastier load of eggs
You may not know this but raising your own chickens in your backyard can give you a healthier load of eggs. Chickens grown in factory farms don’t have the privilege to explore nature, do a little chicken exercise and peck bugs. When these factory farmed chickens lay eggs, the eggs are less nutritious since the hens are deprived of doing natural chickenish things.
Factory farms of chickens are mostly concerned of producing more eggs than focusing on the egg’s quality.
In fact, backyard chicken eggs have a greater percentage of Vitamin E, Vitamin A, beta carotene and omega-3 fatty acids. If the eggs are from your backyard, they are undoubtedly tastier than eggs that you bought in grocery stores. Backyard chicken eggs have firmer whites and brighter yolks.
Fresh supply of chicken meat
Just like the eggs, chickens grown in your own backyard will yield a fresher supply of chicken meat. Since your chickens have the freedom of exploring your backyard, they develop leaner muscles which are actually good during your cooking sessions. Aside from that, whenever you run out of chicken meat, you can always depend on your backyard chickens. Feel free to have a fresh supply of chicken meat whenever you like.
Better compost pit
Chicken droppings are nice things to add in your compost pit. Their droppings are actually rich in nitrogen. Nitrogen for plants is as important as oxygen for humans. With nitrogen, plants can do a better job of cellular respiration; thus, having a better performance in the process of chlorophyll synthesis. Your plants and vegetables will have fuller and greener leaves. As you grow chickens, you can also grow better plants and vegetation. Wouldn’t that be great?
Natural insect control
Chickens love to peck on bugs and other insects. Bugs and insects are naturally the enemies of your vegetation. They nibble on leaves and chew on the root crops. With chickens around, they can help you
minimize the population of insect pests in your garden. Their constant pecking and scratching are a perfect way to save your garden from deteriorating because of insect pests. However, be sure to put a little fencing on your sensitive plants. The chickens might not be able to hold their continuous habit of scratching.
Stress reliever
Just like any other hobby, raising chickens is a way of relieving your stress. It kills your boredom when you have nothing to do at home. They are also fun and interesting to watch. Undoubtedly, raising chickens have a lot of benefits to offer.
Thursday, June 19, 2014
Selling Goat Milk Legally
Raising goats is part of a green, sustainable lifestyle, but if you want to sell your goat milk, you have to understand the laws. Although selling anything other than Grade "A" pasteurized milk is illegal in 46 states, farmers can still sell raw milk legally in 32 states. The states that have legalized the sale of milk that's not from a grade A dairy or pasteurized have done so by passing additional laws or administrative rules.
In 1924, the United States Public Health Service (USPHS) developed a model law called the Pasteurized Milk Ordinance (PMO) to stop milk-borne illness. The intent of the law was to require that only Grade "A" pasteurized milk could be sold to consumers and businesses. So far, all but four states have passed the law or a modified version of it.
Small milk producers have gone around the law by selling shares in their animals, and some state regulators have chosen not to intervene. The share plan, which has been adopted by some people with cows, is like the community supported agriculture (CSA) model, in which people invest in (buy a share of) a farm and get vegetables and fruits throughout the season — only in this case they get milk.
Even if you can't sell milk for human consumption, you may be able to sell it to people for their pigs, dogs, or orphaned animals. In every state but Michigan, goat owners can legally sell raw milk for animal consumption.
Legally selling milk products such as yogurt or cheese without being licensed as a dairy is another story. Most states prohibit sales of these items by small, unlicensed farmers, although in some states the authorities' policy is not to actively seek out people who are selling these products outside of the law.
Small milk producers have gone around the law by selling shares in their animals, and some state regulators have chosen not to intervene. The share plan, which has been adopted by some people with cows, is like the community supported agriculture (CSA) model, in which people invest in (buy a share of) a farm and get vegetables and fruits throughout the season — only in this case they get milk.
Even if you can't sell milk for human consumption, you may be able to sell it to people for their pigs, dogs, or orphaned animals. In every state but Michigan, goat owners can legally sell raw milk for animal consumption.
Legally selling milk products such as yogurt or cheese without being licensed as a dairy is another story. Most states prohibit sales of these items by small, unlicensed farmers, although in some states the authorities' policy is not to actively seek out people who are selling these products outside of the law.
Monday, June 2, 2014
Providing Shelter for Your Goats
To keep your goats safe, you need to provide them shelter. How elaborate your goat shelter is depends on where you live, what structures are available, how much you can afford, and how many goats you plan to have in the shelter. Some of the things to consider when deciding where your goats will live include:
Flooring: Dirt or gravel floors are best, although some people prefer wood. Dirt absorbs urine, and both gravel and dirt, when covered with straw, are warm. Avoid concrete because it's cold and hard on the goats' bodies, although it's easier to clean.
Bedding: Regardless of type of flooring, you need to use some sort of bedding for warmth and comfort. If you do have to use a concrete floor, make sure to put down 3 to 4 inches of wood shavings or straw to insulate the goats.
Dimensions: Consider the height and width of the shelter. Goats need to have 10 to 15 square feet of housing if they also have an outdoor area. When building, think about how easy it will be to muck out old bedding. Having to bend over or stretch a long way while mucking is uncomfortable and hard on your back, so if the goat shelter you build won't be taller than you are, don't make it too deep.
Climate: An open shelter may be fine in a mild, dry climate with good fencing from predators, but it won't work in an area of heavy snow and wind or the open range. Make sure that your building is in an area with good drainage and, if it is open, that it faces away from the prevailing wind.
Herd composition: If you have or plan to have a lot of goats, you need to make sure you have a large enough structure or plan to build more shelters over time. Groups such as bucks, does, and kids to be weaned need separate housing areas.
Storage: Remember that you need to have an accessible (to you, not the goats) place to store feed and goat-care tools.
Access to water: Having easy access to water, but it isn't critical in most cases. Just remember that if you don't have a water source close to your goats' area, you'll be hauling water every day for a long time.
Other considerations: Regardless of the breed, you need an area for doing routine care, such as hoof trimming or clipping. If you're raising dairy goats, you can use the same space for milking. In addition, if you're planning to breed your goats, you need kidding pens, which can be 4 feet by 5 feet; the number that you need depends on how many goats are kidding at one time. Plan on leaving your goats with their babies in kidding pens for two to three days, and make sure that you stagger their breeding so they have a place to go.
Flooring: Dirt or gravel floors are best, although some people prefer wood. Dirt absorbs urine, and both gravel and dirt, when covered with straw, are warm. Avoid concrete because it's cold and hard on the goats' bodies, although it's easier to clean.
Bedding: Regardless of type of flooring, you need to use some sort of bedding for warmth and comfort. If you do have to use a concrete floor, make sure to put down 3 to 4 inches of wood shavings or straw to insulate the goats.
Dimensions: Consider the height and width of the shelter. Goats need to have 10 to 15 square feet of housing if they also have an outdoor area. When building, think about how easy it will be to muck out old bedding. Having to bend over or stretch a long way while mucking is uncomfortable and hard on your back, so if the goat shelter you build won't be taller than you are, don't make it too deep.
Climate: An open shelter may be fine in a mild, dry climate with good fencing from predators, but it won't work in an area of heavy snow and wind or the open range. Make sure that your building is in an area with good drainage and, if it is open, that it faces away from the prevailing wind.
Herd composition: If you have or plan to have a lot of goats, you need to make sure you have a large enough structure or plan to build more shelters over time. Groups such as bucks, does, and kids to be weaned need separate housing areas.
Storage: Remember that you need to have an accessible (to you, not the goats) place to store feed and goat-care tools.
Access to water: Having easy access to water, but it isn't critical in most cases. Just remember that if you don't have a water source close to your goats' area, you'll be hauling water every day for a long time.
Other considerations: Regardless of the breed, you need an area for doing routine care, such as hoof trimming or clipping. If you're raising dairy goats, you can use the same space for milking. In addition, if you're planning to breed your goats, you need kidding pens, which can be 4 feet by 5 feet; the number that you need depends on how many goats are kidding at one time. Plan on leaving your goats with their babies in kidding pens for two to three days, and make sure that you stagger their breeding so they have a place to go.
Monday, May 12, 2014
Miniature Dairy Goat Breeds
If you want to raise goats to promote a more sustainable lifestyle, but you have limited space or don't want to be drowning in goat milk, the miniature dairy breeds might be good choices for you.
Miniature breeds are relatively new to the scene but are growing in popularity. Miniature dairy goats include Nigerian Dwarves, Pygmies, and the most recent development in dairy goats in the United States: miniature, crossbred versions of the standard breeds, called minis. Check out these miniatures:
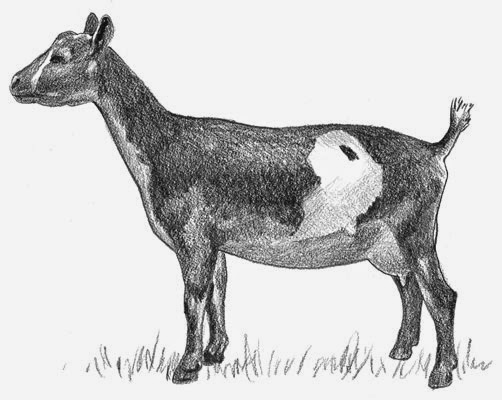
Nigerian Dwarf: Nigerian Dwarves came to the United States from Africa. They are not true dwarves because they are proportionate in size. They are colorful, friendly, easy to handle, and in some cases good milk producers.
The Nigerian Dwarf Goat Association allows 17 to 21 inches for does and 19 to 23 inches for bucks, while the American Goat Society allows a maximum of 22.5 inches for does and 23.5 inches for bucks. They average around 75 pounds.
Some urban goat farmers shy away from the Nigerians, despite their petite size, because they can be loud. But their kids are the cutest things around, and Nigerian Dwarves have a lot of them. The does tend to be easy kidders and natural mothers.
Some Nigerian Dwarves give only about a pound (one pint) of milk per day, but others produce as much as 8 pounds (a half-gallon). A lot of them are hard to milk because of their small teats, but others have been bred to alleviate this problem.
You can eat a Nigerian, but most people don't. It isn't cost effective, and besides, they're so darn cute!
Pygmy: Pygmy goats aren't usually considered dairy goats, but they can be milked. Most of them are raised as pets or 4-H projects, but a small minority of breeders raise them for milk. The Pygmies raised for milk tend to look more like Nigerians in body shape. If you want Pygmies for milk, make sure to ask whether they're registered with the American Goat Society and whether the breeder is milking them.
Pygmies have been bred to be short and stocky and are more limited in color, ranging from white to brown to black with only minor variations. Because they have been bred down to a short, compact size, Pygmies often have problems kidding and need the services of a veterinarian for cesareans. They are not quite as prolific as the Nigerians, either.
Kinder: The Kinder is a moderate-sized breed that was developed in Washington and first registered in 1988. It is a cross between the Pygmy and Nubian breeds. Kinders are good dual-purpose (milk and meat) goats that are ideal for family farms.
Minis: If you really like one of the standard breeds but are in the city or just don't have the space for big goats, minis are ideal. These goats are a cross between a Nigerian Dwarf buck and a doe of the breed you want to miniaturize.
Monday, April 14, 2014
Alpine Dairy Goats
The Alpine Dairy Goat is also referred to as the French Alpine and registration papers for this dairy goat use both designations and they are synonymous. The Alpine dairy goat is a medium to large size animal, alertly graceful, and the only breed with upright ears that offers all colors and combinations of colors giving them distinction and individuality. They are hardy, adaptable animals that thrive in any climate while.
The Alpine goat is referred to as the French Alpine goat. Known for its milk, the Alpine goat is famous for its rich dairy production. Alpine milk contains the lowest fat content of all milks(3.1 g/ 250ml), including that of Human’s and cows. It is higher in Sugar’s than cow’s milk but balances it self in terms of the amount of protein. Alpine Goats milk has 2.3g of protein per 250ml while Cow’s milk has 3.4. A higher protein count is not always good, since it packs more calories with a increased fat content. Compared to Saanen Goat Milk, it is higher in all nutritional aspects. Except the fat content. Making it a much better choice.
Subscribe to:
Posts (Atom)

.jpg)


.jpg)